
Some LCD screens from old cell phones have gained popularity among electronic enthusiats. They are easy to interface with a microcontroller and consume very little power. Best of all they come free or at very little cost. One common problem with these screens is how to connect them to your project. They usually have very tiny contact connectors that are hard or sometimes even impossible to solder to. Here is a nice trick I learned by trial an error how to connect a Nokia LCD to your breadboard without soldering.
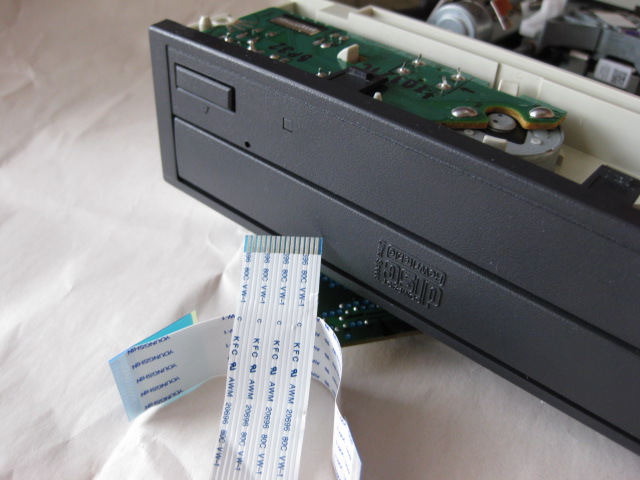
For this purpose you will need to search your junk box for a flex cable with the same pitch as your LCD connector. For my Nokia LCD this happens to be a 1mm pitch cable that I found in an old CD-ROM drive. Similar cables can be found in other computer equipment like printers, scanners, fax machines.
Next steps are :
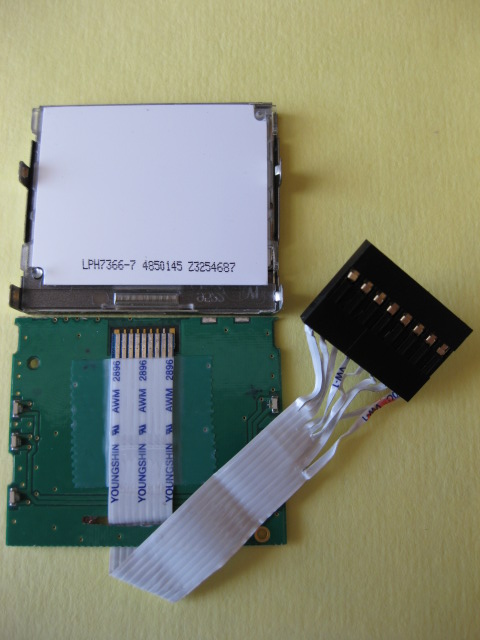
– carefully remove the blue plastic plates that are usually glued to each end of the cable.
– cut the flex cable along to the desired number of wires. My LCD connector has 9 pads so I cut the cable to 9 wires. Use a sharp knife or blade, if using scissors be careful not to damage any wire
– split one end of the cable and attach crimp terminals (female or male) that can be then inserted into a plastic housing, or insulated with shrink wrap tubing.
– finally place the other end of the flex cable on the cellphone PCB so that its wires align with the pads where the LCD connector used to be placed before. Once it's aligned well, use tape to fix the cable in place.
Here is the result after the above step:
Finally snap back the LCD to the board. Your flex-flat wire should be "sandwiched" between the LCD screen and the PCB.
The final result is on the picture (middle item):
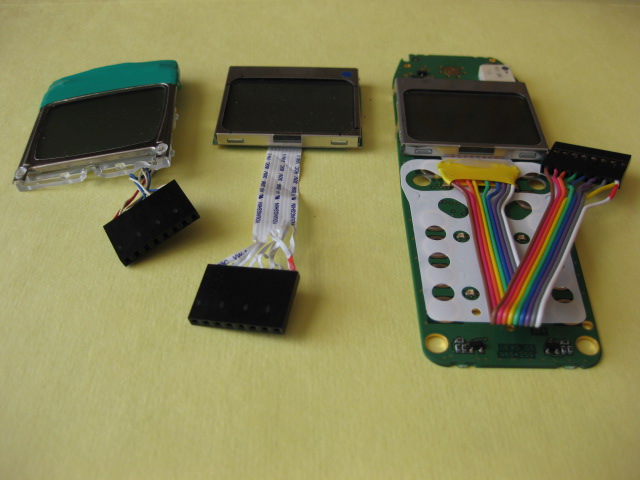
As you can see I've done couple of connectors to different screens that I pulled from different old Nokia phones.
The connectors are actually done using different methods. The first one (to the left) was from a Nokia 3310 phone, and I soldered the wires directly to its pins – not very elegant but it was my first try. The one in the middle I described above and for the one to the right I etched a custom PCB from a thin copper clad to replace the flex wire. Notice that I left one cellphone PCB intact, for the other 2 items the PCB was trimmed. The PCB can be cut easily using a pair of heavy duty aviator snips.
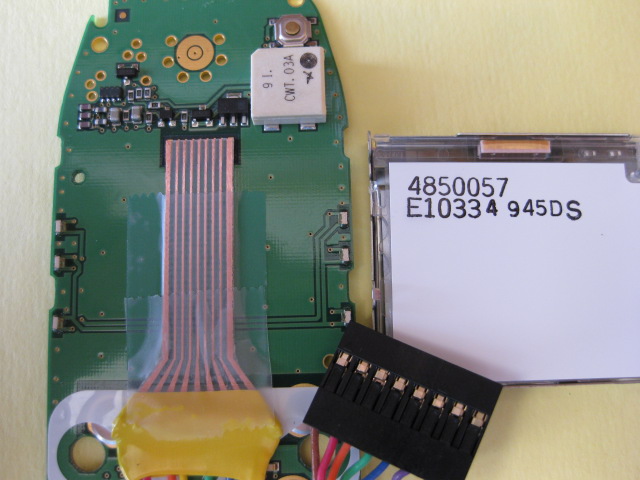
Below is the connector that was done using a custom etched pcb, (I created it since I couldn't find a flex wire for this one, the flex wire is still my favorite). As you can see the mounting principle is the same:
Please note that all my connectors have 8 pins at the other end and are compatible with the Nokia 3310 screens (other similar screens are 3315, 3330, 3350, 3390, 3410, 5510). They have the following pinout: 1. VDD / 2. SCLK / 3.SI / 4. D/C / 5. CS / 6.GND / 7. Vout / 8. Reset
The screens that have 9 pins are from later phone models 5165,5170,5180,5180iP and they have 1 extra pin (Osc) that I connected to VDD and thus got a 8 pin connector at the other end.
I noticed that the 9 pin screens require a slightly higher contrast value, but other than that they are compatible with the 3310 series screens.
Although this tutorial does not go into detail how to program these screens, now that you know an easy way how to physically connect these screens, you can find lots of information on the web, including ready libraries for the AVR and PIC microcontrollers.
///starlino///
Thank you very much!
super !!!
for my this idea was good ..
thanks :)
Thank you very much. Bookmarked.
Hi,
I am wondering how we can change new screens to an old phone? i do have an old Nokia 8910i which i thought of changing to new 260k screen or newer. any ideas?
Pingback: NOKIA LCD URL collection | MOMMOSOFT BLOG
thanx A LOT, THIS IS REALLY HELPFUL FOR ME
hy…
am using 3310 nokia display..for my project called logic analyser…its displaying nothing when i give pulse
from a t.v remote…so i checked whether its workin or not…i gave power supply
its just displaying some lines for 2minutes. and disappearing..please help me.my mail:tejarazz22@gmail.com
Very good idea and perception ! I´m working in some small projects with these displays and I recently disassembled an old HP scanner looking for some useful parts. I was wondering for a good use for the small flat cables and I forgot the LCD pins ! Thanks a lot
Any idea on how to connect a webcam to this dispaly unit ? So that i can show the video from webcam on this mobile screen ..
Nice trick i´ll use this, you know about a good tutorial for make an arduino watch or controlate the LCD?
although these don’t display color I still think it would be cool to connect a composite video input to them
i have a 5165