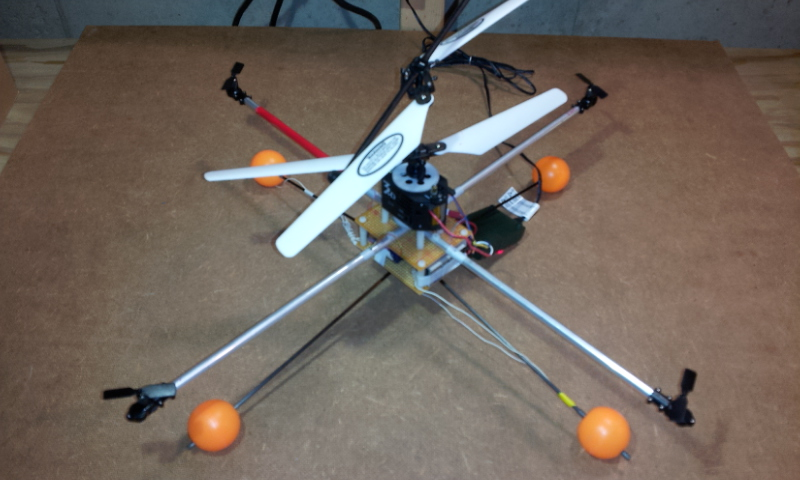
Introducing the QuadHybrid – a stable, maneuverable and cheap flying robotic platform
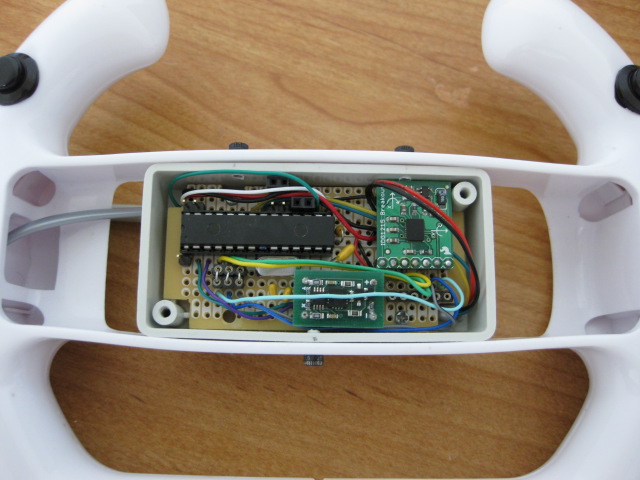
Introduction & Demo of the QuadHybrid Design I’ve been experimenting for quite a while with different configurations of Multi-Copters and RC Helicopters, basically looking for a stable robotic platform that …